Tuesday, July 29, 2014

Asian meatballs with vegetables

CLICK PICTURE TO PIN

Just like American-Chinese food here, Korean-Chinese food is also very popular in Korea. This is called 'Nanjawanseu' in Korean-Chinese menu and considered fancy. But really, it's just meatballs and vegetables with sauce. Perfectly soupy sauce to go over some rice. 


Usually these meatballs are pan fried but I like baking them as it's healthier and easier. When my tot was smaller, I used to make baby version of this dish for him with baby meatballs, just a few drops of sauce and mostly homemade chicken stock, instead of water. I remember him devouring the whole thing and left with sauce all over the place. That face..my gosh, so messy, so cute. =) 

When I make meatballs with all beef, I find it a little dry so I usually mix with some pork but I used organic grass fed ground beef for this, it was so tender. It almost melted in my mouth. What a difference it makes. But if you can't get to it, meatball blend will do the trick too.


Asian meatballs with vegetables 

*Serves 4

Ingredients :
3 scallions, cut to thick julienne strips
2 heads of baby bakchoy, separated
2 cups shitake or cremini mushrooms
2 cloves garlic, minced
2 Tbsp vegetable oil
2 Tbsp corn starch
2 Tbsp water

Meatball
1.25 - 1.5 lbs ground beef 
2 eggs
2 cloves garlic, minced
1 tsp ground ginger
1/2 tsp pepper
1 tsp salt
2 Tbsp mirin or cooking wine
6 Tbsp corn starch

Sauce
1 cup water
1.5 Tbsp oyster sauce
2 Tbsp soy sauce
2 Tbsp mirin or cooking wine
2 tsp sugar or agave syrup
1/2 tsp sesame oil(optional)

Directions :

1. Add all the meatball ingredients in a large bowl and mix well. Make about 1.5 inches meatballs and broil for 15 minutes. 

2. Make the sauce and set aside.

3. In a large skillet or a wok, heat vegetable oil. Saute garlic and add scallion, mushroom and bakchoy to it. 

4. Add sauce and bring it to boil. Add meatballs to it. Once it starts to boil again, mix water and corn starch and add in. Stir. Serve immediately. 


Friday, July 25, 2014

Lemon mayo shrimp

  CLICK PICTURE TO PIN

My family's visiting for a while. My niece's here too and that means two toddlers close in age(4 months apart) are under one roof 24/7. Oh boy..Surprisingly though, it's going pretty well now. I have to say, first few days weren't the easiest but now they are used to each other. But hands down, twin moms are total super moms. My niece is a little picky when it comes to food and that means I need to come up with more kid friendly menu. And this lemon mayo shrimp got her approval.


I used to make this a lot when I was in high school. This was one of my favorite Chinese dishes. This time, I made it with meyer lemon, it gave extra sweetness to the dish than regular lemon. To be honest, this is better than restaurant version- unless it's some high end Chinese restaurant. Better quality shrimp and less batter. Here's how you make these sweet, creamy and tangy little guys.


Lemon mayo shrimp


*Serves 4.

Ingredients:

1 lbs large shrimp, peeled and deveined
1 egg white
1/4 cup corn starch
salt and pepper to taste
1 cup broccoli, steamed
1/4 cup toasted walnut or candied walnut
Oil to fry

Lemon mayo
6 Tbsp mayo
2.5 Tbsp lemon juice
2 Tbsp honey
1 Tbsp milk

Directions:

1. Mix all the lemon mayo ingredients and set aside.

2. Season the shrimp with salt and pepper and mix well with egg white. Add corn starch to it and coat. 

3. In a small sauce pot, heat enough oil to cover the shrimp and fry the shrimp for about 2minutes each batch. I fried in three batches and used about 2 cups of oil.

4. In a large bowl, mix walnuts, shrimp, and broccoli with sauce and serve.
 

Tuesday, July 22, 2014

Corn & bacon mac N' cheese

CLICK PICTURE TO PIN

On one lazy Sunday afternoon, Steve said, "Let's eat something nice but simple for dinner. How about steak?" O..K..I knew where this was heading. He will grill the steak and I will end up making minimum of two sides. Haha "simple" meal.


It's OK. Because..I actually liked the idea! I didn't mind at all to make two sides as long as he brings me a piece of perfectly medium, nicely marbled, grass-fed rib eye. We like simple sides with steak. Our go to steak sides at home are sauted spinach and mac and cheese. Knowing how much my hub loves his mac and cheese, I made extra portion, and we had last minute guests. Lucky I made extra, I didn't have to go crazy. Phew! This easy to make side is always a perfect fit for a great steak.


Corn & bacon mac N' cheese

Printable recipe 

*Serves 4 as a side

Ingredients :

1/2 lbs elbow pasta
1 small shallot, finely chopped
1/2 cup corn kernel
3 strips bacon, cooked and chopped
2 Tbsp butter
2 Tbsp flour
1 cup milk, room temperature
1/4 tsp nutmeg
salt and pepper to taste
3 oz American cheese, shredded 
3 oz sharp cheddar

topping
1/4 cup panko bread crumbs
1/4 tsp dried oregano
1/4 tsp dried thyme
1/4 tsp dried basil
1/4 tsp dried parsley
1/4 tsp garlic powder
1 tsp olive oil

Directions :

1. Cook the pasta as package directions.

2. Meanwhile, melt the butter in a large skillet and saute the shallot. Add flour to it, stir to make it smooth. Add milk, nutmeg, salt and pepper and let it simmer to thicken for about 2 minutes. 

3. Turn the heat off and add cheeses, corn and bacon. Mix in the cooked pasta. Transfer it to an oven safe skillet. Preheat the oven to 375F.

4. Make topping - Mix all the ingredients in a bowl and sprinkle on top of the mac and cheese. Bake at 375F for 20 minutes or top is golden brown. Serve immediately.


Thursday, July 17, 2014

Baked parmesan herb chicken wings

CLICK PICTURE TO PIN

Wings. Those yummy little things. I always tend to make variety of Asian style and buffalo wings when I make wings. But when I found this recipe, I instantly wanted to try it, knowing my half Italian hub Steve would definitely love it. I mean, who can say no to garlic and parmesan? =)


Although...he didn't even get to have any. My tot and I just couldn't stop eating them before Steve got home. Next time, I am definitely doubling the recipe. This is very tasty as it is but with a little dip of balsamic reduction, it tastes even deeper. I actually did not intend to dip in any sauce as it was so good but my tot asked for one of his favorite condiments, balsamic reduction. And my gosh, what a great combination! Thanks baby. =)


I have fresh herbs coming out of my ears, so I used fresh herbs instead of dried herbs but dried herbs will be just fine too. 

Baked Parmesan herb chicken wings


Ingredients :

1 lbs buffalo cut chicken wings
1 tsp fresh oregano, chopped(can be replaced with dried)
1 tsp fresh thyme, chopped(can be replaced with dried)
1 tsp kosher salt
pepper to taste
1 Tbsp olive oil
1 garlic clove, minced
1/4 cup grated Parmesan cheese

Directions :

1. Preheat the oven to 425F. Mix oregano, thyme, salt and pepper. Toss the chicken in the mixture and bake for 20-25 minutes.

2. Meanwhile, mix olive oil, garlic and Parmesan cheese. When the chicken is done, coat the chicken in the mixture and pop back in the oven for 3 minutes. Serve immediately.

*Recipe adapted from Steamy kitchen

Monday, July 14, 2014

Fresh peach pie with mascarpone cream

CLICK PICTURE TO PIN

My good friend from the city came for a visit with her family last weekend. I haven't seen them for a few months and I was so excited to see them. My tot and her daughter used to play together almost everyday before we moved. I miss taking classes together, strolling central park, going to a nearby museum and so on. She said her daughter talks about my tot a lot lately, so very sweet. We miss them so much too. That's it, we had to make it happen!


After chatting up a storm while eating Steve's almost famous smoked ribs that falls off the bone and some swim, summer's privilege - fresh peach pie was served. I love fresh peach pie. You can only get them for such a short period of time, I feel like I have to make them while I can. Like how you feel when you happened to watch TV shopping channel and they say hurry, only a few left. This pie was so refreshing, just like our catch up. What a wonderful weekend. =)

Fresh peach pie with mascarpone cream


Ingredients :

Crust
1 1/4 cup all purpose flour
1/4 tsp salt
1/2 cup cold butter, diced 
1/4 cup ice cold water
Mascarpone cream
8oz mascarpone cheese
1 cup heavy cream
2-3 Tbsp confectioner's sugar 

4-5 ripe peaches, peeled

Directions :
1. Make the pie crust - In the food processor, add flour, salt and butter and pulse until you see pea sized crumbs. Add water and form a dough, chill for a few hours. Roll out the dough on a pie pan, line the top with a piece of parchment paper and use pie weight or beans or rice and bake at 350F degrees oven for 30-40 minutes or until golden brown.(Blind baking)

2. Make mascarpone cream - add all ingredients and whip until stiff peak forms.
3. Tip for peeling peaches - Place the peaches in a pot of boiling water for 30 seconds, using a slotted spoon move them in ice water. After 10-15 seconds, with a pairing knife, gently pinch the skin and peel. Skin will just fall right off and you will have perfectly peeled peaches. Slice them into 6-8 pieces.
4. Fill the cooled pie crust with mascarpone cream and top with the peach slices. Serve immediately or chill until ready to serve. 

*Pie crust recipe - allrecipes

Thursday, July 10, 2014

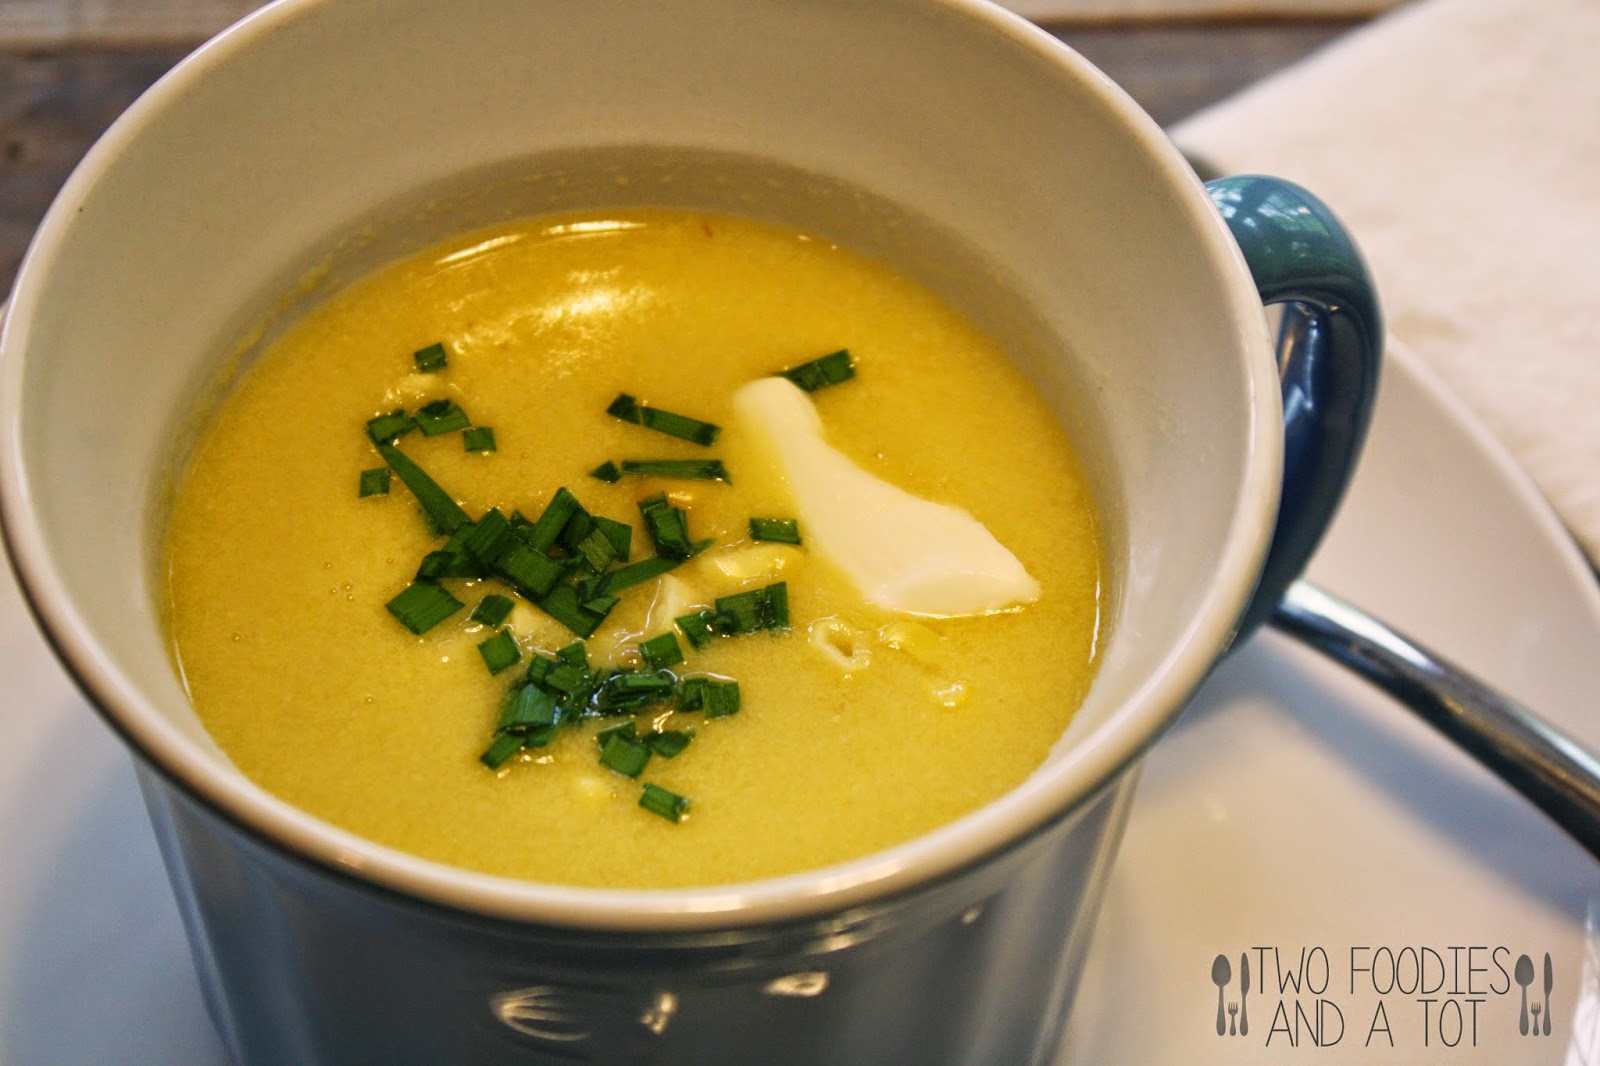
Grilled corn soup


CLICK PICTURE TO PIN

After having 4th of July party and my MIL's birthday party on the same weekend, we were left with a lot of food. I wanted to use all the fresh food before they had to be thrown in the freezer. There's only so much two adults and a toddler can eat and some ended up in the freezer but I did a pretty good job using up most leftover ingredients from the party this week. From corn soup to sausage pasta and so on.


I used leftover grilled corn and basically stumbled upon a hint of charred flavor. But boiling corns will do too if you don't have already grilled corn and don't want to heat up the grill. Soup itself doesn't call for cream but it already has a pretty creamy body due to texture of the corn but a dollop of creme fraiche never hurts. =)

Grilled corn soup


Ingredients :

5 ears of grilled corn, shucked(made heaped 2 cups for me)
2 cups chicken stock
1 Tbsp butter
1 small shallot, diced
salt and pepper to taste
chives, creme fraiche for garnish(optional) 

Directions :

1. In a large sauce pot, melt the butter and saute the shallot until translucent.

2. Add the corn, chicken stock, salt and pepper and bring it to boil, then turn the heat down to medium low until thickened for about 5-7 minutes.

3. Using a blender or immersion blender, puree until smooth. If you want even smoother texture, pour it through a course sieve, pressing it with a spoon. 

4. Depending on the consistency you like, you can serve it as it is or simmer it for a few more minutes to thicken it. 

5. Garnish and serve.

Monday, July 7, 2014

Peach & mint sparkling sangria

CLICK PICTURE TO PIN

As 4th of July weather was party hosts' worst nightmare where we are, we pushed back the party one day and wow, what a great decision. What a beautiful weather and fortunately a lot of our friends could still make it despite the last minute change of the date. Thanks everyone who came and made the party so much fun!


There are countless fabulous summer drinks to enjoy, it was hard to decide on the signature cocktail. I knew many of us liked sparkling drink that is fruity. So I went out to the herb garden, got some mint and started working on it. Hardest part of this is waiting, right? As I used moscato, I didn't need to add any extra sugar which made me feel better. Or..is it basically the same thing as moscato is very sweet? I don't know, I just want to believe it's better for you. Try this easy to make, easy to drink sangria this summer, your summer will be extra fruity! =)

Peach & mint sparkling sangria


Ingredients :

1 bottle moscato(750ml)
1 bottle prosecco (750ml)
1 white or yellow peach, sliced
1 1/2 cup sliced grapes
2 large sprigs of mint 

Directions :

1. In a pitcher, add mint, peach, half of grapes and moscato. Let it sit in the fridge for at least 2 hours or over night.

2. While it's chilling, freeze rest of the sliced grapes for extra chill when you serve. Add frozen grapes and prosecco right before serving. 

*I use the "take out container cover method" when slicing large quantity of grapes. Put one cover right side, fill it up with grapes, cover it with another cover upside down, run a knife through in between covers while holding the top down, you'll be left with perfectly sliced grapes in no time!
 

Herbed cream cheese cucumber bites with smoked salmon


CLICK PICTURE TO PIN

I love the freshness of dill. It's really growing like weed in our herb garden right now. I love it! Besides my planted herbs, there are a lot of other things also residing in the garden that I try to pull out regularly. At our 4th of July party, my friend Avaauthor of this beautifully written book, Eating wildly came. She looked at our garden and pointed out a few of edible weeds. I tried one of them right there and I loved the texture. I don't know what I will come up with but I would definitely like to cook something with them next time.


Anyway, I got a bunch of dill from the garden and started working on this appetizer. Within 10 minutes, I was done! Love it. Such cute little bites with a bit of sophistication. Quick to make appetizers are the best, especially for a large party. I doubled the cream cheese recipe and used half for the appetizer and half for bagel the next day. Oh yum!

Herbed cream cheese cucumber bites with smoked salmon

Ingredients :

1 English cucumber, sliced
4 oz cream cheese, softend
1 scallion, chopped finely
1 Tbsp fresh dill, chopped plus a little for garnish
4 oz smoked salmon, cut into little pieces

Directions :

1. In a stand mixer add cream cheese, scallion and dill and beat until light and fluffy.
2. Put a dollop of cream cheese on each arranged cucumber and top with a piece of smoked salmon and garnish with dill. Chill until serve.

I didn't need to put toothpick or anything and they were very stable without it. 

*Recipe adapted from bakerbynature


Thursday, July 3, 2014

Peanut butter fudge ice cream tartlet

CLICK PICTURE TO PIN

I have mentioned that I am tart crazy lately, right? Here's another version. We had my niece and nephew over for a swim last weekend. Needed something not messy for a dessert that they can eat without getting out of the pool. My nephew's a big fan of tarts and they would also love ice cream on a hot day. So..I thought will ice cream in tartlet work?


Yep, it worked. In fact, it was a perfect dessert to eat by the pool. Pop each one in the mouth, no mess. Well, you just have to eat really fast before they melt but that wasn't a problem at all. They were all gone with a blink of an eye. =) I cut to see what it looks like inside but a lot easier to just pop the whole thing in and enjoy.

In the background in the picture, you can probably see vanilla flavored ones. I used chocolate fudge, vanilla ice cream and cookies and cream sprinkles but for some reason they melted so much faster than chocolate ones, I wasn't so satisfied. I made tartlet shells with my mini muffin pan but you can totally buy a ready to fill type if you want to make it even easier. I have my favorite chocolate ice cream recipe I'd like to share soon but I used store bought chocolate ice cream this time. 


Peanut butter fudge ice cream tartlet


Ingredients :

Tart shell
2 cups all purpose flour
1 cup confectioner's sugar
6 Tbsp unsalted butter, softened
1 egg
1/4 tsp salt
1/4 tsp vanilla extract

PB fudge
1/2 cup peanut butter
1/2 cup cream 
3 Tbsp butter
2 Tbsp Agave syrup
2 Tbsp confectioner's sugar

Chocolate ice cream
chopped up toasted peanut or any sprinkle you like 

Directions :

1. Make the tartlet shell- Pulse all the ingredients in a food processor and make a dough. Make them into little balls and place in a mini muffin pan. Mine made 16 of them. Using back of a melon scoop or your fingers press it down so it makes the shell shape. Prick each bottom with a fork and place the muffin pan in the freezer for 15 minutes. Bake at 350F for 30-40 minutes or until golden brown. 

2. In a small sauce pan, add all PB fudge ingredients except peanut butter. Bring it to a gentle boil and simmer for 5 minutes or so to thicken it a little bit. Remove from the heat, add peanut butter and stir until smooth. Let it cool. It gets a little thicker as it cools. 

3. Place a dollop of fudge in each cooled shell. Using a 1/2 Tbsp ice cream scoop, place a small scoop of ice cream on top of the fudge for the smooth look, if not using 1/2 Tbsp scoop, you can go for a rustic look and put a dollop of ice cream using a regular spoon. 

4. Top with your choice of sprinkle. Serve immediately or keep in the freezer and take it out of the freezer just a few minutes before serving.

*Tart shell recipe adapted from Inspiring the everyday
 Pb fudge adapted from chow.com

Tuesday, July 1, 2014

Blueberry frangipane tart

CLICK PICTURE TO PIN

I am tart crazy lately. So easy to make ahead and I love how versatile it can be. I baked with blueberries but for 4th of July, you can do part raspberry and part blueberry for a patriotic tart. That would be so pretty. 


Check out this piece of shortbread-like crust and nutty almond filling with fresh blueberries. It was a big hit at my tot's pool play date. Toddler approved dessert! It's funny how almost all toddlers I know love blueberries.


I like tarts all seasons but especially this summer, I think I will eat a lot of them in many different ways with all kinds of fresh fruits. My mouth is already watering with just the thought of fresh peach tart/pie. =)

Blueberry frangipane tart


Ingredients :

Tart shell
2 cups all purpose flour
1 cup confectioner's sugar
6 Tbsp unsalted butter, softened
1 egg
1/4 tsp salt
1/4 tsp vanilla extract
 

Frangipane
1/2 cup ground almond meal
1/4 cup granulated sugar
1 egg, room temperature
3 Tbsp butter, softened
3/4 tsp vanilla extract
1 Tbsp all purpose flour

1 1/2 cup fresh blueberry 
powder sugar for dusting(optional)

Directions :

1. Make the tart shell - In a food processor, pulse all ingredients together and form a dough. 

2. Lightly butter the tart pan and press the dough evenly to the bottom and the sides of the pan. Prick a few holes with a fork, cover with plastic wrap and freeze for 15 minutes. Preheat the oven to 350F. Bake for 30 minutes or until it turns light brown, but not golden.

3. While shell's baking, make frangipane. Pulse all frangipane ingredients in a food processor until mixture becomes a paste. 

4. Spread the frangipane in the tart shell and top with blueberries. Bake at 350F for 25 minutes or until frangipane is risen and golden. Cool for at least 15 minutes before removing the tart from the tart pan. 

*Tart recipe adapted from Inspiring the everyday
 frangipane - Rebecca Franklin