Showing posts with label Snack. Show all posts

Tuesday, August 18, 2015

Simple Tzatziki


The other day, Steve was flipping channels on TV and we naturally stopped when we saw my big fat Greek wedding on. It's such a great movie with super low budget and is loved by so many people. As we were watching that movie, I randomly saw someone's facebook post that they're making a sequel. WHAT?! That is awesome!

Steve has some Greek friends and they confirmed that a lot of the stereotypes of Greeks are true including windex. Haha. That's pretty funny. Maybe I am wrong but I find them very similar to Italians. Big families, like to have fun, lots of yummy food and so on. They're both mediterranean, so it's probably natural just like different asian countries share somewhat similar culture. 


Mediterranean food is so refreshing, Steve and I used to be obsessed. Now that the movie has brought us back to the memories, we should make more of Greek food. Steve used to make Greek salad for dinner every single day and not get tired of it, plus he lost a lot of weight. We have a new neighbor who are Greeks, we brought some cookies the day they moved in and met them. Maybe I should bake some more and knock on their door and learn to cook some real Greek food!

Tzatziki is not only great for gyro and simply grilled chicken, it makes a fabulous dip for crudites, baked pita, potato chips, you name it. Creamy, garlicky yet, refreshing with a whole lot of cucumber. When I want something simple for entertaining without making multiple dips for veggies and chips, I always go with this. Because it develops such yummy flavor as it sits in the fridge, you can make ahead the night before entertaining. Make ahead dishes are always the best when you entertain, aren't they? =) Here's how you bring your guests to Greece at a bite!
  

Simple Tzatziki

Printable recipe 

Ingredients :

1 1/2 cup Greek yogurt(fat free works just fine)
1 Tbsp lemon juice
2 cloves garlic, minced
1/2 English cucumber, peeled
1 Tbsp olive oil plus to drizzle on top
3/4 tsp salt
2 tsp dill, chopped

Directions :

1. Scrape the seeds from English cucumber and grate it through large holes of cheese grater. Squeeze grated cucumber to remove liquid and let it sit on a sieve.

2. Mix rest of the ingredients in a bowl and stir in cucumber. Drizzle a little olive oil on top before serving. 

*It's a perfect make ahead dip as the flavor develops as it sits in the fridge. Serve it with crudité of your choice or toasted pita.


Friday, June 26, 2015

Slow cooker spinach artichoke dip


With my tot's camp and busy schedule, this week has gone by so fast. It's been almost a week since we celebrated Steve's 4th father's day. How was everybody's father's day? It was supposed to be a wash-out where we live. So the whole exciting BBQ idea was out the door. We had to go a different way and made Italian father's day. Steve's family's Italian, so it suits anyway. Since there was a huge chance everything would be inside, we changed the appetizer menu entirely too. We ended up getting lucky and had a few hours of beautiful sun, which means kids stayed in the pool, no craziness in the house! Yay!


So, we served homemade Italian plus costco lasagna. I know it's cheating but their lasagna is just so darn good! But their spinach artichoke dip, I didn't find very good. So I decided to make yummy and super easy spinach artichoke dip. You just need to dump everything in the slow cooker and "fugetaboutit"! How easy is that. Even though it's very cheesy, it's got vegetables, and I made it with Greek yogurt and low fat cream cheese to lower the calories. Our au pair Lari doesn't like vegetables but even she said it's delicious! Since she's not familiar with this dip, I didn't tell her what it was in detail. =P 

Thinking we were totally lucked out with the weather, after a huge meal, we put out all sorts of desserts outdoor. Half way through dessert, it started to pour like the end of the world. Lucky everything was served in the covered patio but it was so crazy that everything was still getting wet. CHAOS. We managed to save all of our delicious desserts though. Phew! In that chaos, our mini slept through. Actually she pretty much slept through all afternoon. Everyone wanted a chance to hold her, moving from one person to another, it didn't even wake her. She totally gets spoiled when the family's over. =) 

Hope your father's day was a dry and fun one. 


Slow cooker spinach artichoke dip

Printable recipe

Ingredients :

1 (14oz) can artichoke hearts, drained and chopped
1 (10oz) pack frozen spinach, thawed
1/2 cup crumbled feta
3/4 cup grated Parmesan cheese
1/2 cup Greek yogurt
1 small onion, chopped
2 tsp garlic, minced
1 Tbsp red wine vinegar
1/4 fresh ground black pepper
1 (8oz) block reduced fat cream cheese

Directions :

1. Squeeze the thawed spinach and drain most of the liquid. In a slow cooker insert, add all the ingredients except cream cheese.

2. Cube the cream cheese and place on top of everything else. Cover and cook on low for 2 hours.

3. Stir to mix everything. Serve warm. 

*Adapted from some the wiser.

Tuesday, April 21, 2015

Spiced candied nuts


I usually crave spiced nuts during cold weather. But recently I visited my friend and she had some spiced nuts on the table and I completely emptied it. Then that craving didn't go away. I had to make some and have some in my house! We like candied nuts for salad and because I bake a lot, we usually have some kind of nuts at home and I could start right away. 

I've always done cinnamon version but never added cayenne before until I found this recipe. This is so yummy! A little hint of spiciness. I actually made two versions. One batch with cayenne and another version with paprika so my tot can enjoy it too. I was sending a big care package for my sister who just had my new niece and this was a great add on too. She loves whatever I make and on top of that, she loves spiced nuts. Anything with cinnamon. 


This is so addictive that I have to really control myself. No more than a small bowl at a time. Otherwise I would just empty a jar without knowing. Since it's warm and nice out now, we will be entertaining a lot. And even though it's not the weather you crave warm spices, I think it's a great snack to put out with the "welcome drinks" when the guests arrive. Okay, I have been staring at these pictures long enough. Time to sneak into the pantry and get some before my tot finds me. =)

Spiced candied nuts


Ingredients :

3 cups nuts of your choice(I used equal parts of pecans,almonds and cashews)
1 egg white
1 Tbsp water
1/3 cup brown sugar(light or dark)
2/3 cup granulated sugar
1 Tbsp cinnamon
1 tsp kosher salt
1/2 tsp cayenne pepper or paprika for mild version

Directions :

1. Preheat the oven to 300F. 

2. Whisk egg white and water together until frothy. Pour over nuts and toss. 

3. Mix both sugars, cinnamon, salt and cayenne or paprika and pour it over the egg white and nuts mixture and toss well. 

4. On a parchment paper lined baking sheet, spread out evenly. Bake for 28-30 minutes and let it cool. When cooled, break the clusters if desired. Keep in airtight container. 

*Recipe from Avery cooks

Tuesday, April 14, 2015

Balsamic skirt steak & polenta bites


Wasn't last weekend just perfect? Oh we needed it so badly. It was so nice I was in such a great mood even though I was so busy and exhausted. And what comes naturally with this great weather? BBQ! YES! BBQ season is back! We scrubbed the bbq inside and out and was ready to go! Well..Okay, I have to be honest, Steve scrubbed the bbq. I supervised. =P


Nutty yet crispy grilled polenta with slightly spicy baby arugula and tender steak with sticky balsamic glaze. OMG, so yummy. I just LOVE polenta. It's so simple to make polenta at home but yet, it's even easier to buy a cooked polenta log so I always go the lazy way. I always have to grill extra polenta as my tot devours these.

With skirt steak, I am sure you all know it but you have to be really careful not to overcook it, otherwise it's not edible. Once time I was talking to Steve while cooking it, got distracted and I completely overcooked it and ruined his dinner. =( 

If you prepare it in advance, like marinating ahead, this is a great, quick appetizer(takes just less than 10 minutes to cook) to please guests or a fabulous small portion lunch. 
 

Balsamic skirt steak & polenta bites


*Makes about 2 appetizer portions

Ingredients :

steak marinade
1/4 cup balsamic vinegar
1 Tbsp worcestershire sauce
2 tsp dark or light brown sugar
1 garlic clove, minced
salt and pepper to taste
 
1 lb skirt steak(or flank steak)
1/2 log ready to grill polenta, sliced
1 Tbsp olive oil
2 cups baby arugula, washed
1 cup balsamic vinegar
 

Directions :

1. Mix all marinade ingredients in a bowl and marinate skirt steak for at least 30 minutes.

2. In a sauce pan,add balsamic vinegar and bring to a boil. As soon as it start boiling, turn the heat to simmer and simmer for 10 minutes or until it reaches syrupy consistency to make balsamic glaze.
 
3. Heat oil in a grill pan and grill polenta until golden brown on both sides. I grill about 3 minutes each side.

4. Grill the steak about 3 minutes each side and remove from the grill pan or grill. Tent it with a foil and let it rest for 8-10 minutes. Slice thinly.

5. Arrange grilled polenta on a plate and top with baby arugula and skirt steak and drizzle balsamic glaze.
 
* Marinade recipe by Pointless meals.

Tuesday, April 7, 2015

Homemade "saltine"


It was a crazy week last week. Weather's finally becoming more appropriate for the season and I had so many late nights. Thankfully not late nights due to the tot waking up, those nights were voluntarily planned by me. I can't remember the last time I was out till close to midnight! Great fun week but by the time Sunday Easter brunch was over, I just passed out. Haha. Not going to happen again for a while I guess.

As I mentioned a few times before, my tot loves all things crispy. And he loves saltines. I love experimenting homemade commercial snacks. After trying homemade goldfish/cheese crackers, oreos and so on, saltine was my next project in mind. When I found this recipe, I tried right away as it's so simple. The only thing that needs effort is rolling out the dough thin. We have a pasta maker so I could just feed the dough through and it wasn't that big of a deal but if I didn't, it would be a lot of work. I like how the bubbled up parts are so crispy. 


The reason why I call this "saltine" or saltine-like crackers is, it is not EXACTLY like saltine but it definitely taste like saltine. Texture is slightly different. Maybe because they're too thin? Would not making holes makes make a difference? I don't know but these were pretty darn good and addictive. It might sound funny but I like my saltine with some berry jam. Dip these in a little jam for a little sweetness or snack on them as is. Simple ingredients and my tot couldn't stop munching on these. At least I know what exactly is in it. Whether you want something simple homemade snack to munch on or to serve it with cheese for the guests, I think this will work very well. I didn't mean to scare you by saying it needs effort, if you roll it out as a couple of large sheets, it won't be that much of work. And your patience will be well worth it!

Homemade "saltine"


Ingredients :

1 cup all purpose flour
2 Tbsp unsalted butter, melted
1/4 cup water
1/2 tsp kosher salt
water for brushing
salt for sprinkling

Directions :

1. In a food processor, pulse the flour and salt. Add melted butter and pulse until it resembles coarse meal.

2. Add water and pulse until dough is formed. Dough will still be on the crumbly side. Put them on a clean surface and knead to make a moist dough disk.

3. Rest the dough for 30-60 minutes.

4. Preheat the oven to 400F and roll out the dough very thin. Cut into squares and place them on a parchment paper lined sheet pans and brush the top with water. Sprinkle salt evenly.

5. Bake for 8-10 minutes or until golden brown. They crisp up more as they cool. Keep in airtight container. 

*Recipe by stress cake.

Thursday, March 26, 2015

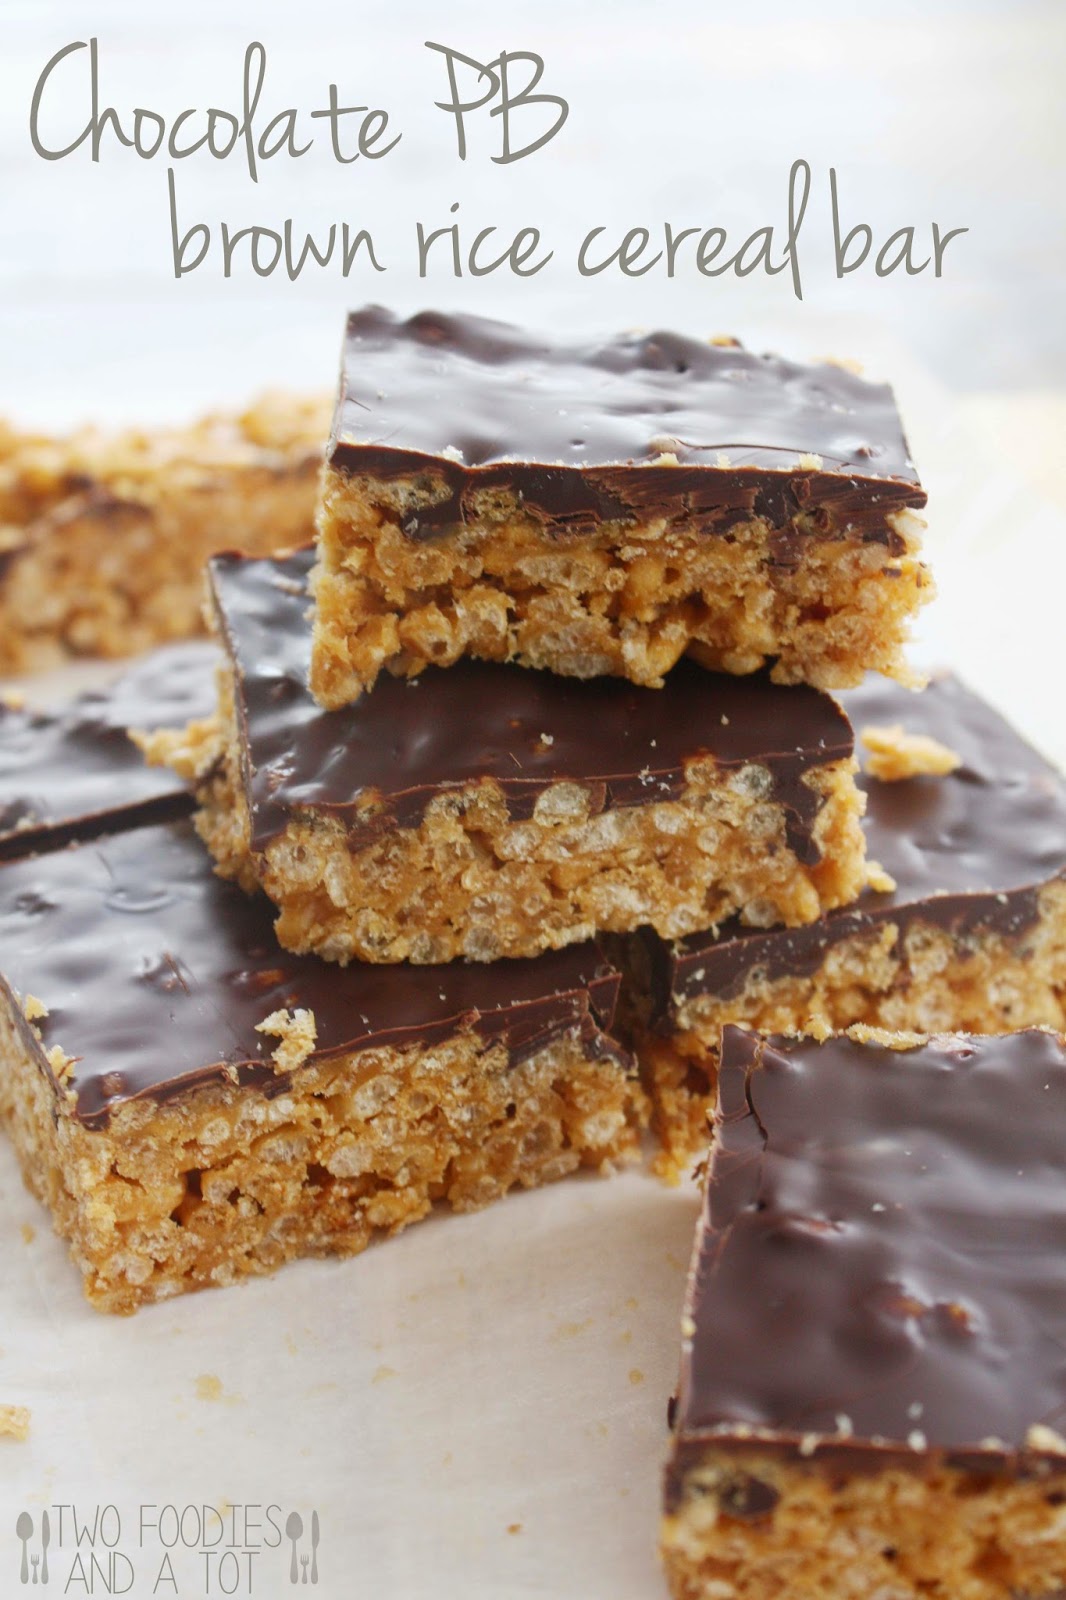
Chocolate peanut butter brown rice cereal bar


A few days ago, I went to my favorite local cafe called Sook. They have the best pastries and cakes in town. So glad I found this place. Not a lot of places makes the perfect earl grey chocolate mousse cake and they do. Enough reason to stop by often. There was(or maybe still is) a pastry cafe at one of the Hyatt hotels in Dubai that I used to go to all the time and they had the perfect earl grey chocolate mousse cake. Even in Europe, I haven't had that kind of perfection. Slightly crunchy middle, rich and smooth mousse with a hint of fragrant earl grey. Ever since I left Dubai, I have been on a search for that perfect bite but no luck, not even in NYC. Until I found this place. 

They open at 6am everyday so my tot and I like going there for breakfast at like 7-730am. Crazy but whoever has a toddler knows breakfast can easily happen at 7am. Even at that early hour, this place is busy. Commuters picking up their coffee and pastry and people like me. Going for a peaceful and enjoyable breakfast when not a lot of people are around since I was dragged out of my bed by a 3yr old anyway. 


The other day was a different story though. It was my mistake that I went in at 9:30 which is exactly when everyone's done dropping off their kids at school. There was one last table left in the sunny corner. Fine, I miss the sun. But no wonder that was the only table left! I probably came out with some good color on my face. Direct sunlight on me. Cafe full of loud people. ARGH! Get me out of here! I left as soon as I finished my coffee which is very unusual. 


That was one of the crazy mornings I had this week. And I'm so glad it's almost weekend. Although, believe it or not, there's a chance of snow here on Saturday. Not excited about that. 

 Anyway, Steve recently said I haven't made peanut butter dessert lately. So I was on it. We always have brown rice cereal at home and decided to make some bars with them. And I found this perfectly quick and easy recipe which only calls for whatever I had in the pantry. I made a little portion without chocolate topping thinking I'd give it to my tot but of course I ended up eating it because he demanded chocolate one. If your child doesn't see the chocolate part, you're pretty safe. It's so good either way. I keep the bars in the fridge and take some out as needed rather than keeping them room temperature for a little extra crunch. 

Chocolate peanut butter brown rice cereal bar


Ingredients :

1/3 cup peanut butter(or any nut butter)
1/4 cup brown rice syrup
1 Tbsp maple syrup
2 tsp vanilla extract
2 cups brown rice cereal(I use unsweetened wholefoods brand)
1/2 cup chocolate chips(dark or milk, depending on your preference)

Directions :

1. In a sauce pot, mix peanut butter, brown rice syrup and maple syrup and melt over low heat. Just when it starts to bubble turn off the heat. Add vanilla extract. 

2. Add brown rice cereal and stir well so it's well mixed. 

3. On a parchment paper lined pan, place the whole mixture and pat into desired shape. Let it cool for about 10 minutes.

4. Melt the chocolate and spread on top of the bar. Refrigerate for an hour or so and cut into bars. Enjoy!

*I find them tastier when kept in the fridge. You can keep them in an airtight container for about a week. 

*Recipe from Texan Erin.

Tuesday, February 24, 2015

Liege waffles


If you've ever been to NYC, you'd know about Waffles and dinges. It's a waffle truck started by a Belgian guy. Years ago when I went to Belgium, I totally fell in love with liege waffle. Regular Belgian waffle's totally yummy too but really, it's got nothing on liege waffle in my opinion. And of course NYC has got to have it somewhere! They have a few locations, my usual place was right outside of Bobby Flay's Bar Americain. And when I realized that I can get this beautiful bite of liege waffle right around my block in UES, I was over the moon! They only came to my block once a week though. Sunday morning. It was so convenient. I would go out and wait in line with my "hello, I just rolled out of bed for this goodness" look. 

Then my tot came in the picture. I used to stroll with him in central park almost everyday and these waffle guys have a cart there. It's not a truck, it's a cart in the park. And it was always a struggle to pass it. Then I would give in. Justifying, I will eat this waffle and jog around the great lawn a couple of loops, it will burn those calories right? Haha. Well..I was obviously dreaming but boy, that was good. And when my tot was old enough to walk with me, we would park the stroller at our favorite picnic spot, sit down and share enjoying nice breeze. That little mouth enjoying every bite of mommy's favorite waffles. Ah...memories. 


After we moved to suburbia, I guess I haven't looked hard enough but I haven't found liege waffles in any of good breakfast spots. It is not the most common waffles I have to say. So..what do I do? Make them at home! It's actually very simple to make them if you plan ahead. Because this is dough with yeast not batter, it takes some planning. But process is super simple. All you need is a little time. I whip the dough the night before and put it in the fridge. Next morning, take it out, add pearl sugar and let it rest while waffle iron's heating up. Then you're good to go. 


You can serve it with any of your favorite toppings. I love it with a little Spekloos(cookie butter). SO GOOD! That's how waffle guys serve it too. I always say no to whipped cream for liege waffle because I just don't like it with warm and chewy waffles, but that's just me. Come to think of it, I think have pretty particular preference when it comes to my waffles. Even though I don't take whipped cream for my liege waffle, I like my regular Belgium waffles with whipped cream and thin apple jam.

Oh, one thing about pearl sugar. You can usually get them from wholefoods or specialty food stores, if that doesn't work, amazon has them. You'll find Swedish and Belgian. Swedish is a lot finer than Belgian. You're supposed to use Belgian but I happened to have a lot of Swedish at home so until I use it all, I will be using Swedish and it is totally fine. Pearl sugar gets caramelized slightly in the waffle iron and gives a beautiful crunch to the chewy waffle. Because of the caramelization, it even taste fantastic without any topping. 

If you have a small family like us, you won't finish all these waffles. You can keep the leftover in the fridge for a few days and toast them as you need or they freeze well too. Very yummy when toasted. This is one of the few leftovers I actually get excited to eat. =)

Liege Waffles

*Makes about 10-12 waffles
 

Ingredients :

1 pkg dry yeast(1/4oz pack)
1/3 warm water
1 1/2 Tbsp sugar
1/8 tsp salt
2 cups all purpose flour
3 eggs
1 cup butter, softened
1 cup pearl sugar

Directions :

1. Add dry yeast and sugar to warm water. Let it sit for 10-15 minutes.

2. In a bowl of a stand mixer fitted with a dough hook, add flour and salt. Add yeast mixture and start kneading. 

3. Add eggs to the mixer one at a time. When all mixed, add butter to it about 2Tbsp at a time, letting it fully incorporated. Batter won't be smooth at this point. 

4. You can let it rise in double for about an hour if making right away or just cover it and refrigerate overnight, it will slowly rise. 

5. When ready, heat the waffle iron. Meanwhile, mix in pearl sugar to the dough and let it rest for 15 minutes. Using an ice cream scoop, place the dough on the waffle iron and cook. 

*Recipe from butter baking.
 Method slightly changed. 
 

Friday, January 23, 2015

Mini corn dogs


Last couple of weeks, I have been craving fried food. Churros, fried chicken, tempura, you name it. Of course I didn't get to have any of those because I don't like frying at home. And my cravings tend to turn to different directions if I'm at a restaurant. Then for some reason, I remembered wanting to try homemade corn dogs recipe I found from one of my favorite bloggers, damn delicious. When I first saw this recipe, it immediately brought me back my childhood memory. If you remember from one of my previous posts, my mom rarely let me eat street food. Corn dogs were always very tempting at fairs and when I ask her, majority of the times, she would redirect me but sometimes(but very rarely)she gave in and let me have one corn dog. To this day, I still remember enjoying every bite of the slightly sweet, fluffy, corn bready goodness hugging the savory hot dog. Mmm.


As I was frying these, my tot woke up from his nap and was looking for me. Before he got grumpy, I went to attend him and I asked Steve to watch the stove for a second. And Tada~ we slightly burnt a couple of them. Haha. Oh well..We had some good ones too. I actually made them smaller. Instead of halving the hot dog, I cut them into three pieces each so it's the right size for my tot. Surprisingly, it tasted exactly like how I remembered. I have tried mini corn dog muffin trying to make healthier version but it had obviously different taste. It was good but not for my cravings. A lot of times I like baked version of originally fried dishes but unfortunately some things just have to be fried. It was such a quick process with not too much oil, thankfully it didn't make my whole house smell like frying. Phew! If you ever have cravings for corn dogs, you can simply make it at home with very little effort!

Mini corn dogs


*Makes 8 mini hot dogs
Ingredients:

4 hog dogs, halved(I use uncured organic hot dogs)
1/2 cup all purpose flour
1/2 cup corn meal
1/2 cup milk
1 egg
2 Tbsp sugar
2 tsp baking powder
salt and pepper to taste
1 cup vegetable oil for frying

Directions :

1. Heat the oil in a skillet over medium heat.

2. Put lollipop sticks in the cut hot dogs. 

3. Combine flour, corn meal, sugar, baking powder, salt and pepper. Whisk together milk and egg, add the egg mixture to dry ingredients. Whisk until combined. It's easy to dip the hot dogs if you make the batter in a tall narrow vessel. 

4. When the oil is ready dredge hot dogs in the batter to cover completely and fry each one until golden grown, about 2-3 minutes. 

5. Place them on a paper towel lined plate. Serve immediately. 

*Recipe from Damn delicious.

Friday, November 14, 2014

Grilled cheese rice patties


It just got so cold over night. Apparently, there was a little bit of snow last night too. I cannot believe winter's almost here already! Last weekend, we just put Halloween decorations away, and I took a quick nap and came down and I see our 12' Christmas tree in the living room. Steve is a planner but this was a little ridiculous. Until we moved here, we always had a small tree that is just a little bigger than the Charlie brown tree. Even though it's so small, watering it, cleaning up the needles on the floor was pain. So we got a gigantic fake tree, now that we have space. Haha. One good thing about having a fake tree, you can put it up whenever you want and clean up is easy. 


And this tree is really making my tot excited. He was so excited, running around the tree, singing and dancing. This Christmas will be so much fun now that he understands what's going on better. We didn't decorate the tree yet as Steve thinks it's too early. Uh...if it's too early, why bother putting up the tree already? Sometimes I don't know what's going on in his head. But it sure is making everyone in this house excited for Christmas already. And what is this tree to do with grilled cheese rice patties? The other day, as my tot was going to school, I asked him what he wanted me to make for lunch. He said he wanted to eat something that looks like a tree I was going to make some quick grilled cheese and use a tree cookie cutter but I didn't want to eat the border of the shape after cutting the tree for Mr. tot. And I had some leftover rice and veggies needed to be used. So when he came home, I said "Look, it's green like a tree!" He bought it. Awesome. =) 


Grilled cheese rice patties


Makes 3-4 rice sandwiches
Ingredients :

Rice patties
1 cup cooked rice
1/2 cup broccoli, finely chopped
2 eggs
2 Tbsp corn starch
1/2 cup onion, finely chopped 
salt & pepper
Oil or butter to grill the patties

3-4 slices ham
3-4 slices cheese of your choice

Directions :

1. In a mixing bowl, mix all the ingredients of rice patty. Heat the griddle and add oil or melt the butter(You don't need a lot of oil). Spoon the rice mixture and spread to the size you like. Cook on medium heat. 3-4 minutes.

2. Flip when bottom looks browned but not overdone. 

3. Add ham and cheese between two patties as you would for grilled cheese and grill until cheese is melted. Serve.


Monday, November 10, 2014

Homemade Mozzarella sticks


When my tot was a little younger, like any babies, cheese sticks were staple in hour house. If I gave him one stick, he would be quiet for a long time. But after some time, he grew out of these cheese sticks. Instead, he started to go for a little more flavorful cheese. If I give him Asiago pieces and string cheese together, he would only pick on Asiago. BUT! He still absolutely loves mozzarella sticks. The other day we baked a few of the last mozzarella sticks for a quick snack and he was not happy that there's no more. I promised him he could have more next time and he moved on. Then I was on it. 


It's so easy to make and everybody loves mozzarella sticks, so it's good to have them in the freezer for last minute guests or a quick but filling snack. I have to admit, anything breaded and baked or fried is generally pretty fantastic. Since I'm making a little mess while breading anyway, I usually make a bigger batch and keep them in the freezer. 

Homemade Mozzarella sticks

* Makes 24 sticks
Ingredients :

12 sticks of string cheese
2 eggs, beaten
3 Tbsp flour
1 1/2 cup Italian breadcrumbs 
2 Tbsp finely grated Parmesan cheese

Directions :

1. Cut the string cheese in half and freeze. Mix breadcrumbs with grated Parmesan cheese and set aside.

2. Coat the frozen cheese sticks with flour then egg, then breadcrumbs. You can fry them or bake them at 375F for 7 minutes. When baking, spray oil lightly on the bottom and top.

*If not using right away, put them in the sheet pan in a single layer and freeze. When frozen, transfer all of them to a ziplock bag.

Friday, October 24, 2014

Parmesan wonton crisps

 CLICK PICTURE TO PIN

My tot goes nuts over anything crispy. When I make him toast, he loves the crust. When he eats pizza, he loves the crust. Roasted chicken, he likes the crispy skin. So this snack is definitely right up his alley. Super quick to make and so tasty. We almost always have wonton wrapper at home as I like to make homemade wonton and pot stickers. And of course a block of Parmesan is a staple in a half Italian household. I actually used Asiago one time and it was so good. 

CLICK PICTURE TO PIN

I usually end up eating more than I intend to every time I make these. I make a batch and snack on a few, place them in a container but it's basically pointless to even put them in the container, as my tot's little hands would go for it, Steve would walk by it for a "taste test" and of course I join him. By that time it's usually all gone. When you want a quick snack that is not fried, yet so tasty you can even serve as part of your appetizers for your guests, this will be a great fit.

Parmesan wonton crisp


Ingredients :

1/2 pack wonton wrapper
1/2 cup olive oil
1 cup Parmesan cheese, shredded
1/4 cup fresh parsley, chopped - or 2 Tbsp dried parsley
salt and pepper to taste

Directions :

1. Preheat the oven to 375F.

2. Cut the wonton wrappers(triangles or rectangles) and spread on a baking sheet in a single layer.

3. Brush the olive oil on each wonton wrappers and sprinkle salt, pepper, cheese and parsley. (Go easy on the salt as cheese is salty. I didn't use any salt and it was fine.)

4. Bake for 8-10 minutes. Let it cool for a few minutes and enjoy. 

*Recipe from Life as a strawberry

Monday, October 13, 2014

Chia seed pudding

 CLICK PICTURE TO PIN

My tot has always been a cheese and yogurt lover like any kids. At one point, I thought he's taking too much dairy in his diet as he eats yogurt and cheese many times a day. So I switched him to almond milk instead of cow's milk. Well, he still drinks 2% milk too but mainly he drinks almond milk. I love the nutty taste of it and the fact that it's non dairy, it makes me feel healthier. 

 
CLICK PICTURE TO PIN

Since we add chia seeds in our yogurt all the time, I knew chia seeds strangely become gelatinous but never thought to use it for pudding until I found this recipe months ago. I didn't find extra maple syrup was necessary for the strawberries as the ones we had was very sweet and tasty. And we usually only have unsweetened almond milk at home and with maple syrup added to it, it was the perfect sweetness for us. I personally don't like sweetened milk, so I didn't go out of my way to buy vanilla flavored almond milk. This is a great breakfast or a perfect after nap snack for my tot.

Chia seed pudding


Ingredients :

1 cup vanilla flavored almond milk(unsweetened was fine for me though)
1 cup plain low fat Greek yogurt
2 Tbsp maple syrup(plus 4 Tbsp for serving if you prefer)
1 tsp vanilla extract
1/8 tsp kosher salt
1/4 cup chia seeds
1 pint strawberries, halled and chopped
1/4 cup sliced almond, toasted

Directions :

1. In a medium bowl, whisk almond milk, yogurt, maple syrup, salt and vanilla extract.

2. Add in chia seeds and let it stand for 30 minutes. Place it in the fridge over night.

3. When ready to serve, toss strawberries with 4 Tbsp maple syrup and mix with almond slices. 

4. Spoon the pudding to serving cups and top with strawberry-almond mixture. 

Thursday, October 2, 2014

Quinoa granola bar

CLICK PICTURE TO PIN

You know I love toasted quinoa if you have read my previous posts. Another way to enjoy it is to make it into bars. Last summer when we went to Myrtle beach, I brought a large bag of these bars with us and that was a life saver at our beach family photo shoot. We eat dinner early due to my tot's schedule and it was a sunset photo shoot. Exactly when my tot was supposed to eat. O..K..Usually my life revolves around my tot's schedule but we had to do what we had to do. He loves his granola bars and it kept him going for the entire photo shoot. Phew!


Spelt seeds is one of the things we have at home but not being used often enough. I use it just like oatmeal. But for some reason, average mornings, I'd go for oatmeal rather than spelt seeds. This is the perfect way to use these healthy stuff more often. When it's toasted, it's very nutty. For nuts to add in it, it can be totally flexible as any granola bars. Depending on what I have in the pantry, it defers but a lot of times, I use toasted thinly sliced almonds, walnuts and cashews. This time, I threw in some toasted pumpkin seeds too since it was just right there. Hmm, let me make it sound a little better. Pumpkin seeds were added since it's fall! 

Steve likes these with a drizzle of chocolate. Yeah..I know, of course everything's better with a bit of chocolate. Feel free to go ahead with the chocolate. I'm telling you, it's absolutely delicious. But I don't need a toddler all hyped up more than he already is, so I don't. =P


Quinoa granola bar


Ingredients :

1/2 cup rolled oats
1/4 cup spelt seeds
3/4 cup toasted quinoa
1/2 cup mixed nuts
2 Tbsp butter
1/4 cup honey
1/4 cup brown rice syrup
1 tsp vanilla

Directions :

1. Toast rolled oats and spelt seeds at 375F for 8-10 minutes.

2. Meanwhile, Add all wet ingredients in a sauce pan and bring it to a gentle boil. 

3. Mix all the dry ingredients in a mixing bowl and pour honey mixture and mix well. Preheat the oven to 325F.

4. Line a rimmed 8 x 8 baking pan with parchment paper with a little extra for easy lifting. Pour the mixture and spread it evenly.

5. Bake for 20-25 minutes. Cool and cut to size you desire. If you keep it in the fridge, you get more crunch.